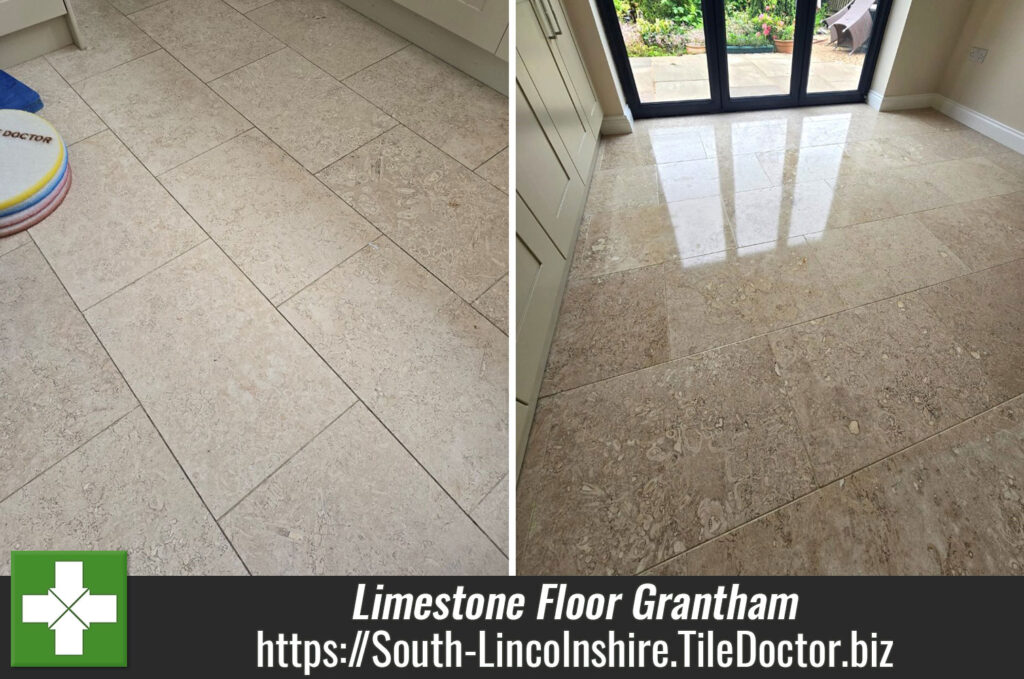
Dull Limestone Floor and Wall Tiles Polished and Sealed in Grantham
I was contacted by a homeowner near Grantham who was having trouble keeping his Limestone floor clean. The floor was installed throughout much of the ground floor and over the years it had become dull, and the grout had become darker in main walkway areas.
They wanted a quote for renovating the whole floor, so I visited the property to survey the tiles and grout and discuss the options. I could see that the floor needed some TLC to restore it to its former shine and so I recommended honing the Limestone with a set of diamond encrusted burnishing pads to fully restore the polished appearance and then protecting it with one of our quality sealers.
 |
 |
While we were there the client also asked if we could sort his limestone shower cubicle that needed some similar work. We agreed the price and dates over email and booked in the work for both areas.
Burnishing Limestone Floor Tiling
Upon arrival silicone mastic was run under the woodwork in the Kitchen including the kickboards and end panels to protect from water ingress during cleaning. Moving onto to cleaning the first pad in the diamond pad system which was a coarse 400-grit was fitted to a rotary buffer machine. The machine is fitted with extra weights to improve traction and the pad run over each tile several times using only water for lubrication.

Once each tile had been cleaned the floor was rinsed with more water and the slurry extracted with a wet vacuum. The pad was then changed to an 800-grit and the process repeated and then again with a 1500-grit pad. This higher grit pads slowly refinish the stone after the coarse bad and add polish.
The floor was then inspected and any stubborn stains in the grout treated with a manual scrub of Tile Doctor Pro-Clean.
Burnishing Limestone Wall Tiling
To restore the shower area, a hand-held polisher fitted with 6-inch pads was used. Basically, it’s the same system as the flooring but scaled down for wall tiles. Some grouting was also replaced where cracked and once done the silicone sealant between the wall tile and shower tray was stripped out and replaced with new.
I used fans in all areas to help speed up drying.
Sealing a Limestone Tiled Ground Floor and Shower Cubicle
Day two started by checking the tiles were reasonably dry and then proceed to dry polish the stone with a 3000-grit burnishing pad which brings out the best shine.
The client wanted the stone and grout to stay as light as possible so Tile Doctor Ultra-Seal was selected. This is an impregnating sealer which is virtually invisible and won’t darken the stone. The sealer was applied to both the floor and wall tiles allowing thirty minutes drying time between coats.
 |
 |
The end result was very satisfying for both the flooring and shower tiles. The client was delighted and left a top review which I’ve copied below:
For aftercare cleaning of the floor tiles, I recommended Tile Doctor Neutral Tile Cleaner which is a gentle yet effective tile cleaning product designed for use on sealed tiles. For the shower tiles I recommend Tile Doctor Aqua Pro which is a similar product but comes in a spray bottle for easy use.

Professional Restoration of a Limestone Tiled Ground Floor and Shower Cubicle in South Lincolnshire
Dull Limestone Floor and Wall Tiles Polished and Sealed in Grantham Read More »