Burnishing Pads

Scratched Limestone Floor Polishing Horncastle

Dull and Scratched Limestone Floor Polished in Horncastle

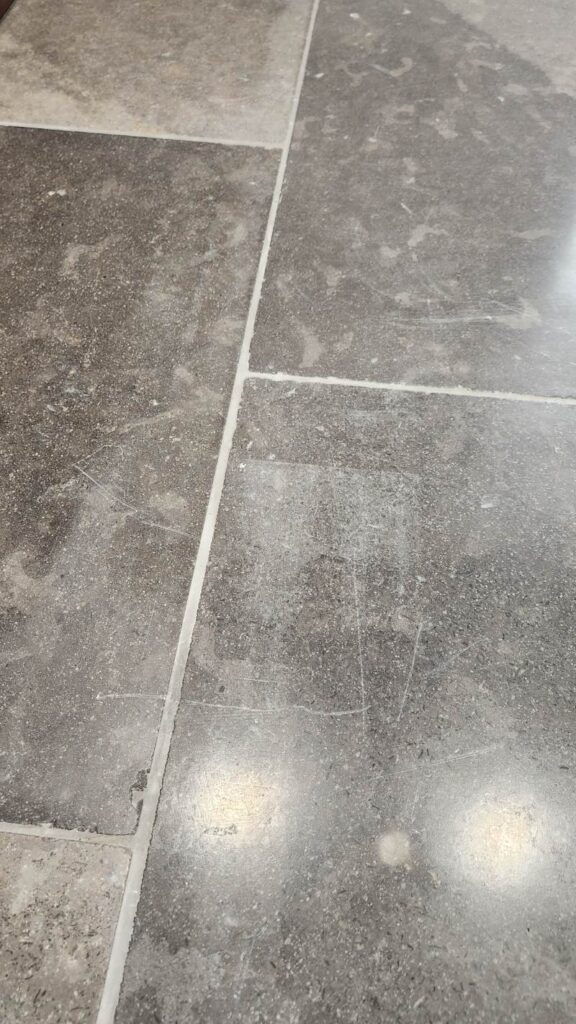
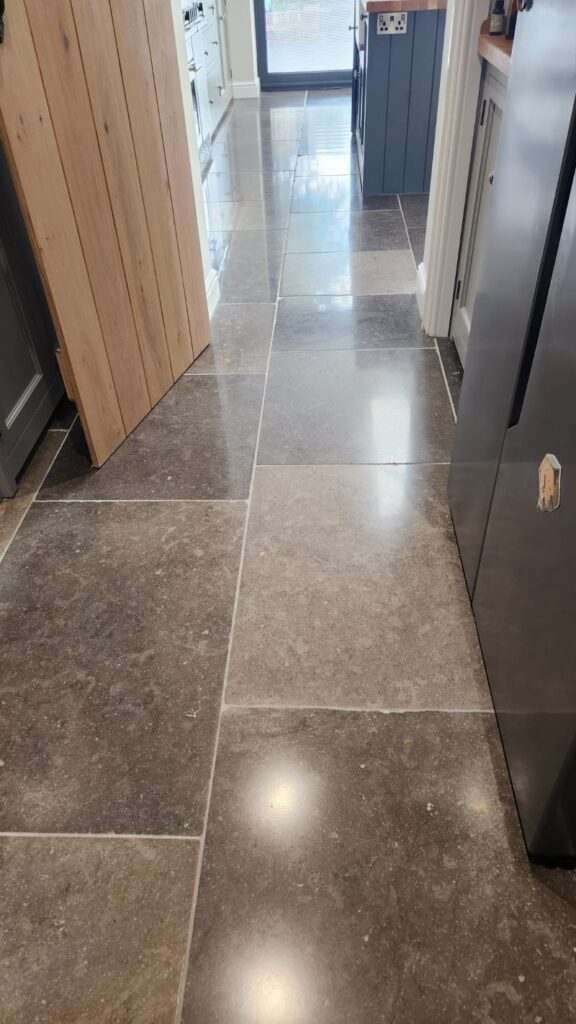
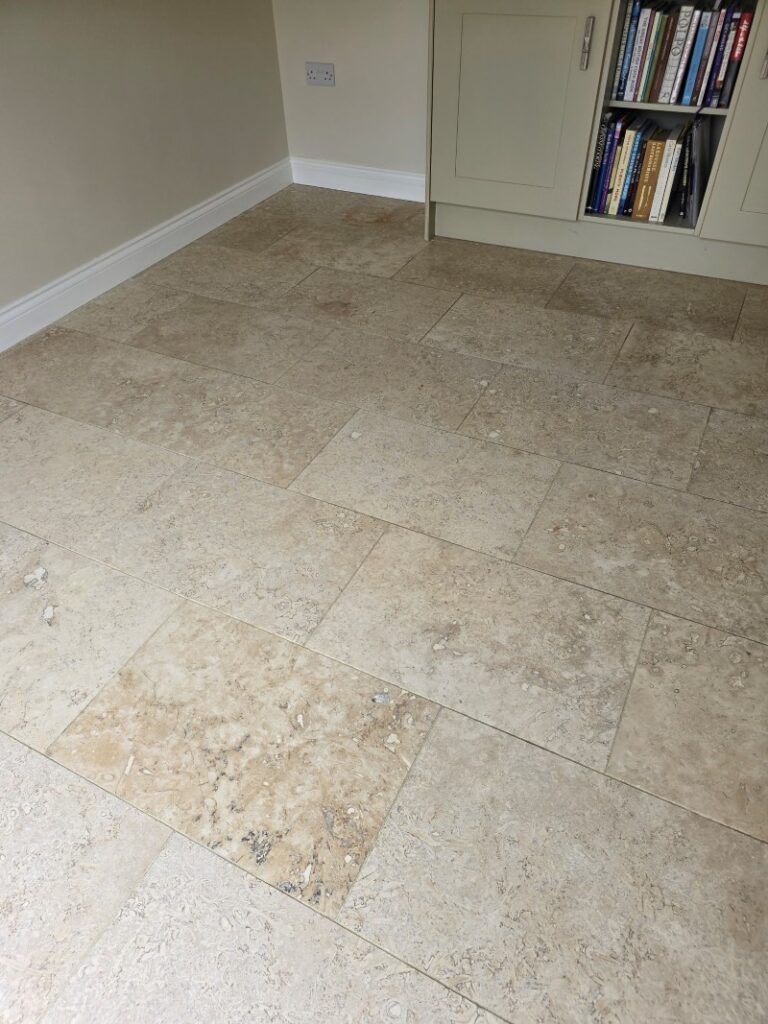
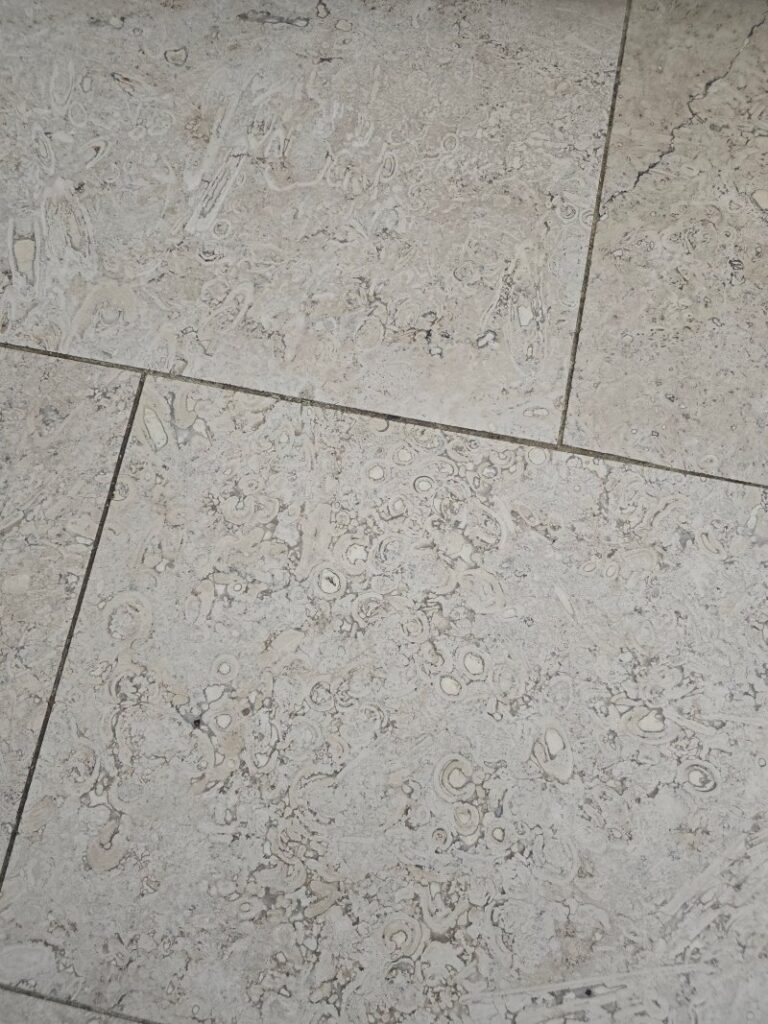
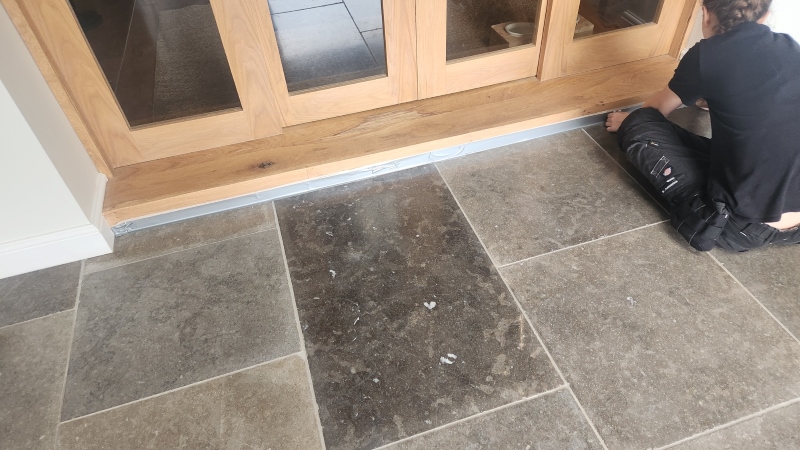
Here we have a beautiful Limestone tiled floor installed in the kitchen and adjacent dining area at a property in Horncastle. We were asked to polish the floor in order to bring up the finish and also remove the fine scratched and etching caused by furniture and pets.
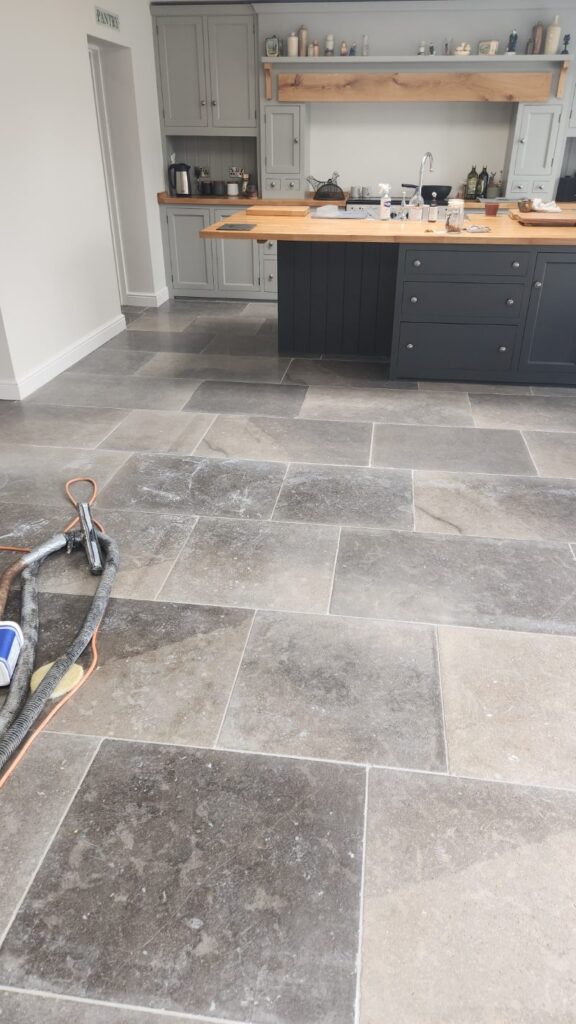
Scratched Limestone Floor Before Cleaning Horncastle Scratched Limestone Floor Before Cleaning Horncastle

Polished stone floors like this one do need regular polishing to keep them looking their best and, in this case, it had been a while since had last been done. After measuring up and investigating a few problem areas we discussed the plan to renovate the floor and worked out a quote for the work. Happy with the quote we set a date for my return.

Polishing Limestone Flooring

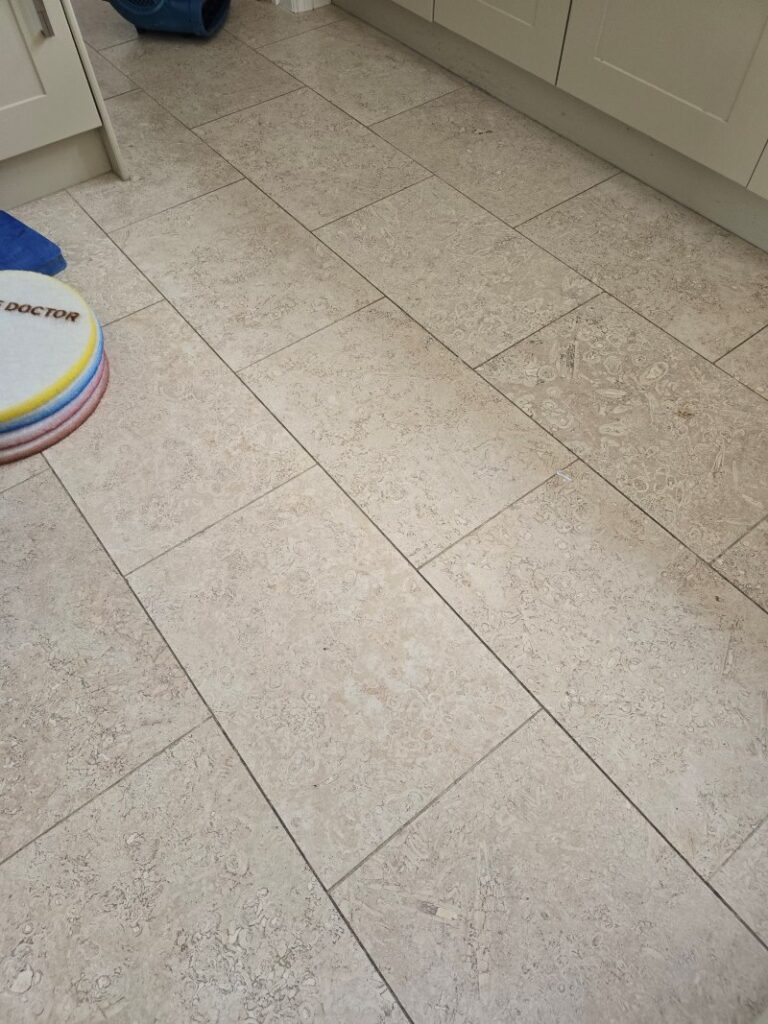
To remove the light scratches and bring up the polished appearance of the stone the best course of action is to hone the stone with a set of diamond burnishing pads of different grits. After adding protection to vulnerable areas, the burnishing work then started with a coarse 400-grit pad fitted to a rotary machine which had extra weight added to increase traction with the floor.
Scratched Limestone Floor Before Cleaning Horncastle

The 400-grit pad removes old sealers, light scratches and opens the pores in the stone so the dirt can be flushed out. Once the pad has been run over each tile several times the floor is rinsed with water and the soiling extracted with a wet vacuum.

The pad is then swapped out for a medium 800-grit and the process repeated and then again with a fine 1500-grit pad. These pads close the pores and build-up the polished appearance of the Limestone.

The burnishing process is then finished off with the application of a very fine 3000-grit pad which is applied in the same way but with only a little water sprayed into the floor.

Once complete a floor fan was setup and left to run overnight to ensure the floor would be nice and dry and ready for sealing the next day.

Saling a Polished Limestone Floor in Horncastle

On our return the Limestone was checked for moisture using a damp meter. This confirmed the stone was dry and work could then start to apply the sealer to the floor.

I used a colour enhancing sealer called Tile Doctor Colour Grow for this which helps bring out the natural colours and shades in the stone. It’s also an impregnator which means it works by soaking into the stone, occupying the pores, and thereby preventing dirt from residing there. This ensures dirt remains on the surface where it can easily be cleaned away.
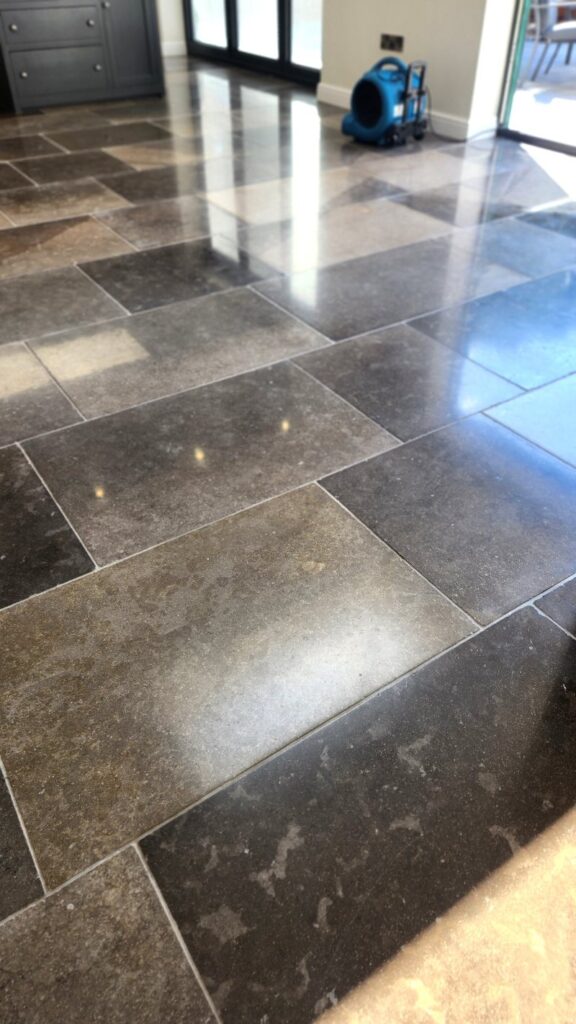
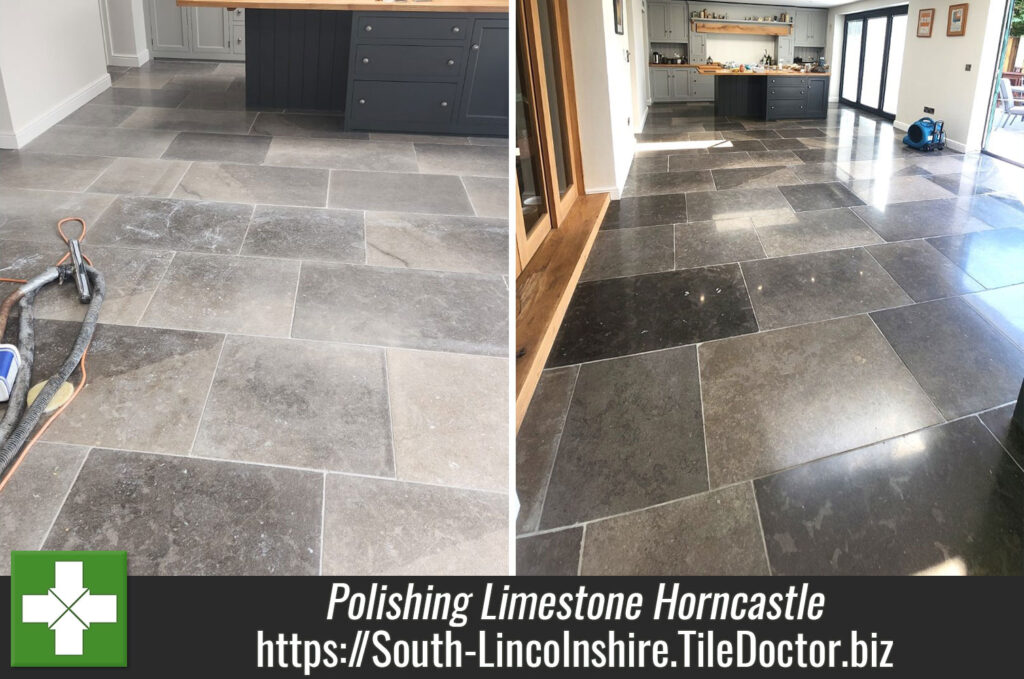
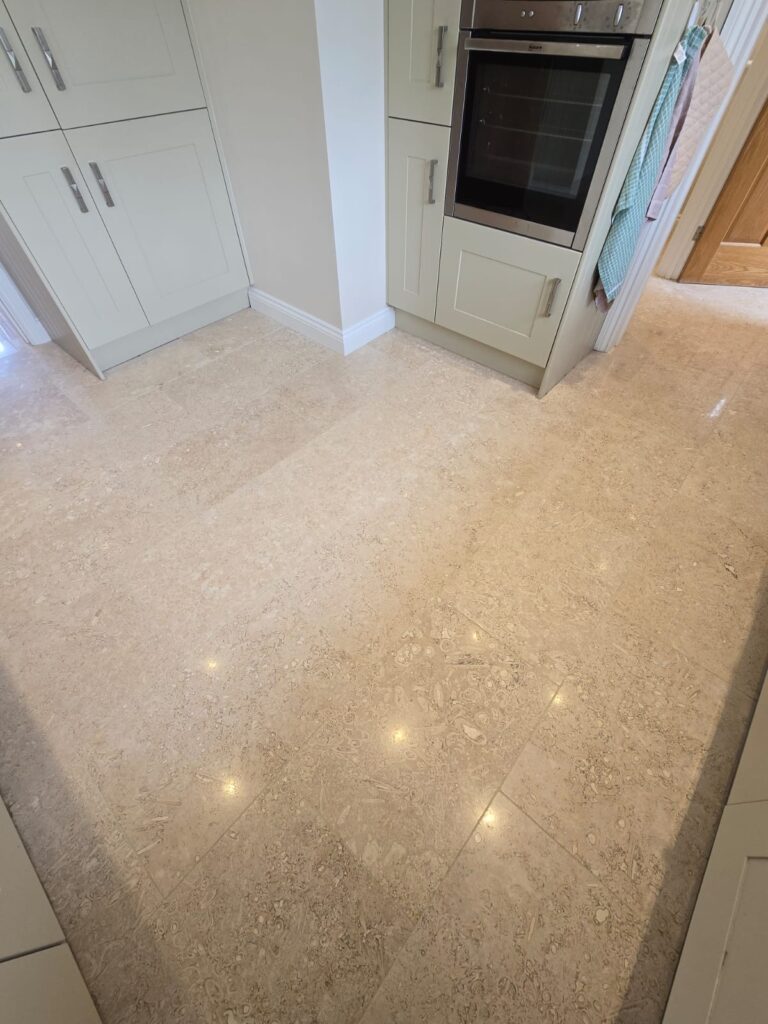
Scratched Limestone Floor After Renovation Horncastle Scratched Limestone Floor After Renovation Horncastle

Once complete the scratches were gone and the floor looked amazing with a lovely deep polish that reflected the light. The customer was delighted, and the new sealer will ensure the floor is easier to keep clean in future.
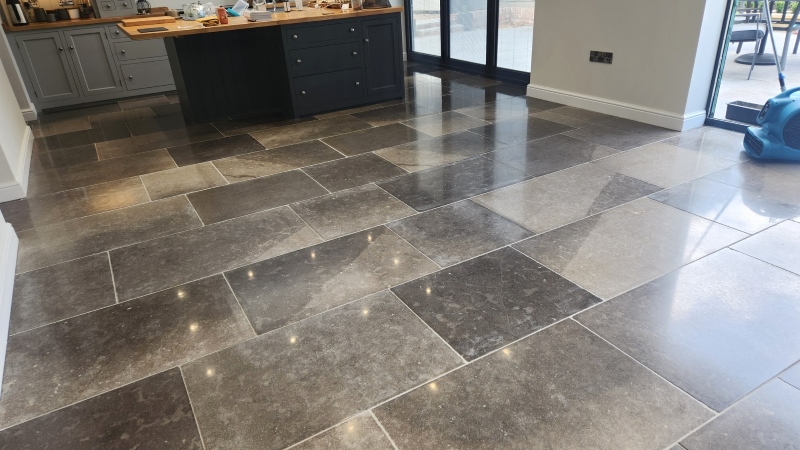
Scratched Limestone Floor After Renovation Horncastle

On the subject of maintenance cleaning, we recommend Tile Doctor Stone Soap for polished stone floors, it won’t impact the sealer, and contains a patina enhancer that will help maintain its appearance.


Limestone Tiled Floor Professionally Polished in Horncastle

Dull and Scratched Limestone Floor Polished in Horncastle Read More »

Limestone Floor Renovation Grantham

Dull Limestone Floor and Wall Tiles Polished and Sealed in Grantham

I was contacted by a homeowner near Grantham who was having trouble keeping his Limestone floor clean. The floor was installed throughout much of the ground floor and over the years it had become dull, and the grout had become darker in main walkway areas.

They wanted a quote for renovating the whole floor, so I visited the property to survey the tiles and grout and discuss the options. I could see that the floor needed some TLC to restore it to its former shine and so I recommended honing the Limestone with a set of diamond encrusted burnishing pads to fully restore the polished appearance and then protecting it with one of our quality sealers.

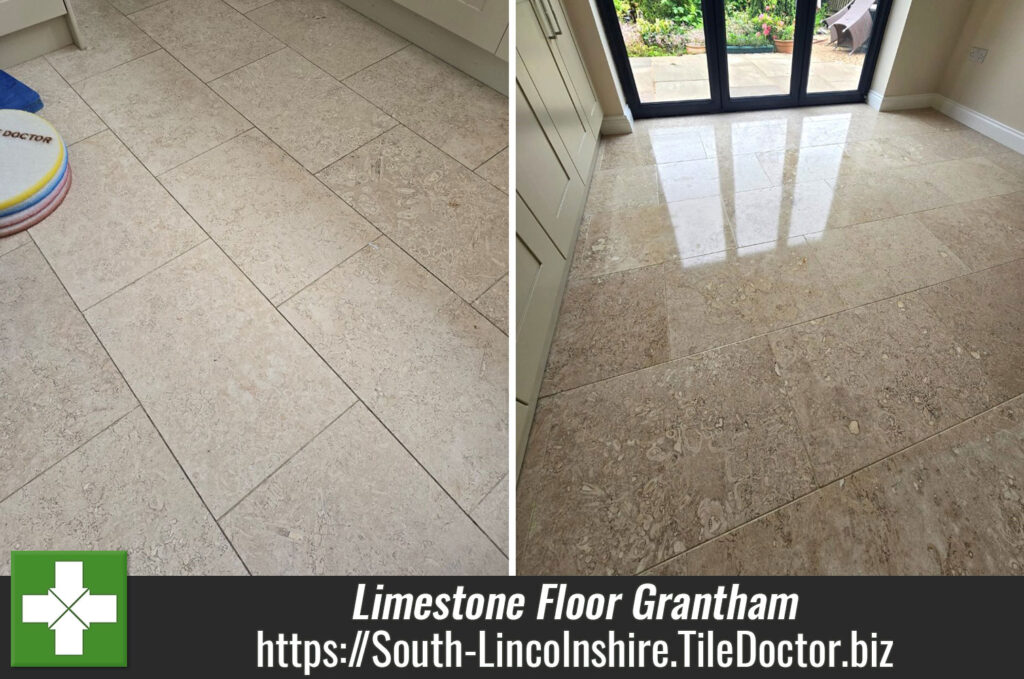
Limestone Floor Before Polishing Grantham Limestone Floor Before Polishing Grantham

While we were there the client also asked if we could sort his limestone shower cubicle that needed some similar work. We agreed the price and dates over email and booked in the work for both areas.

Burnishing Limestone Floor Tiling

Upon arrival silicone mastic was run under the woodwork in the Kitchen including the kickboards and end panels to protect from water ingress during cleaning. Moving onto to cleaning the first pad in the diamond pad system which was a coarse 400-grit was fitted to a rotary buffer machine. The machine is fitted with extra weights to improve traction and the pad run over each tile several times using only water for lubrication.

Limestone Floor Before Polishing Grantham

Once each tile had been cleaned the floor was rinsed with more water and the slurry extracted with a wet vacuum. The pad was then changed to an 800-grit and the process repeated and then again with a 1500-grit pad. This higher grit pads slowly refinish the stone after the coarse bad and add polish.

The floor was then inspected and any stubborn stains in the grout treated with a manual scrub of Tile Doctor Pro-Clean.

Burnishing Limestone Wall Tiling

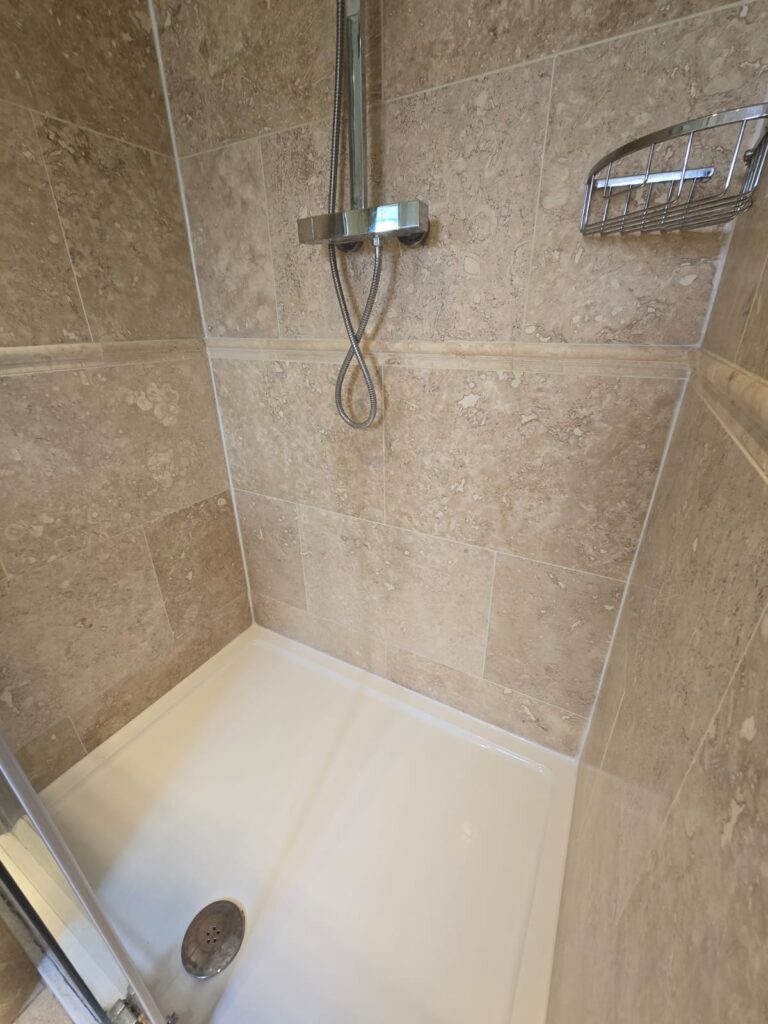
To restore the shower area, a hand-held polisher fitted with 6-inch pads was used. Basically, it’s the same system as the flooring but scaled down for wall tiles. Some grouting was also replaced where cracked and once done the silicone sealant between the wall tile and shower tray was stripped out and replaced with new.

I used fans in all areas to help speed up drying.

Sealing a Limestone Tiled Ground Floor and Shower Cubicle

Day two started by checking the tiles were reasonably dry and then proceed to dry polish the stone with a 3000-grit burnishing pad which brings out the best shine.

The client wanted the stone and grout to stay as light as possible so Tile Doctor Ultra-Seal was selected. This is an impregnating sealer which is virtually invisible and won’t darken the stone. The sealer was applied to both the floor and wall tiles allowing thirty minutes drying time between coats.

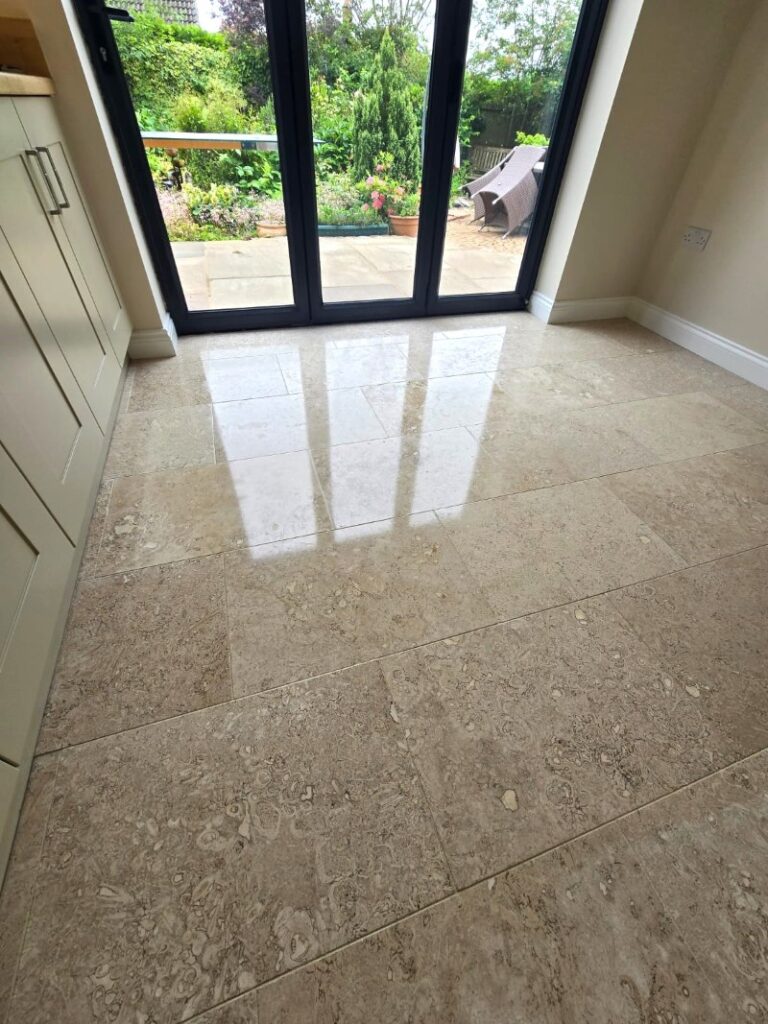
Limestone Floor After Renovation Grantham Limestone Floor After Renovation Grantham

The end result was very satisfying for both the flooring and shower tiles. The client was delighted and left a top review which I’ve copied below:

“I was very impressed with Phil’s quality of work, our kitchen limestone floor is as clean and bright as it must of been when first laid over 20 years ago. Phil gave regular communication throughout the process, arrived on time, and was polite and informative. Nice one tile doc.”

For aftercare cleaning of the floor tiles, I recommended Tile Doctor Neutral Tile Cleaner which is a gentle yet effective tile cleaning product designed for use on sealed tiles. For the shower tiles I recommend Tile Doctor Aqua Pro which is a similar product but comes in a spray bottle for easy use.

Limestone Shower Tiles After Renovation Grantham


Professional Restoration of a Limestone Tiled Ground Floor and Shower Cubicle in South Lincolnshire

Dull Limestone Floor and Wall Tiles Polished and Sealed in Grantham Read More »

Travertine Floor Polishing Boston

Replacing the Sealer and Polishing a New Travertine Tiled Floor in Boston

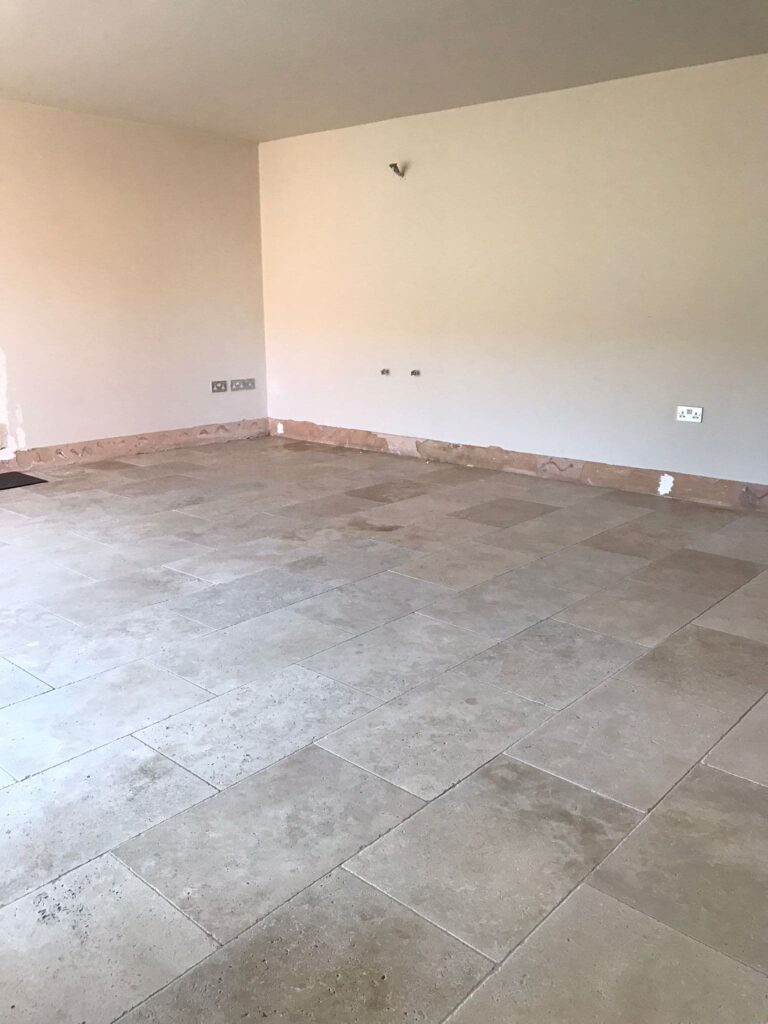
A regular customer from Boston got in touch with us before Christmas to help with a Travertine floor they had laid in their front room. It turns out that they were so impressed with our previous work that they had decided to replace their lounge carpet with more Travertine.

Unfortunately, however the new travertine floor turned out dull and lack lustre despite the tiler putting a sealer on after fitting. Unhappy with the floor appearance I was asked if the floor could be re-finished to match their original Travertine floor that I had worked on previously.

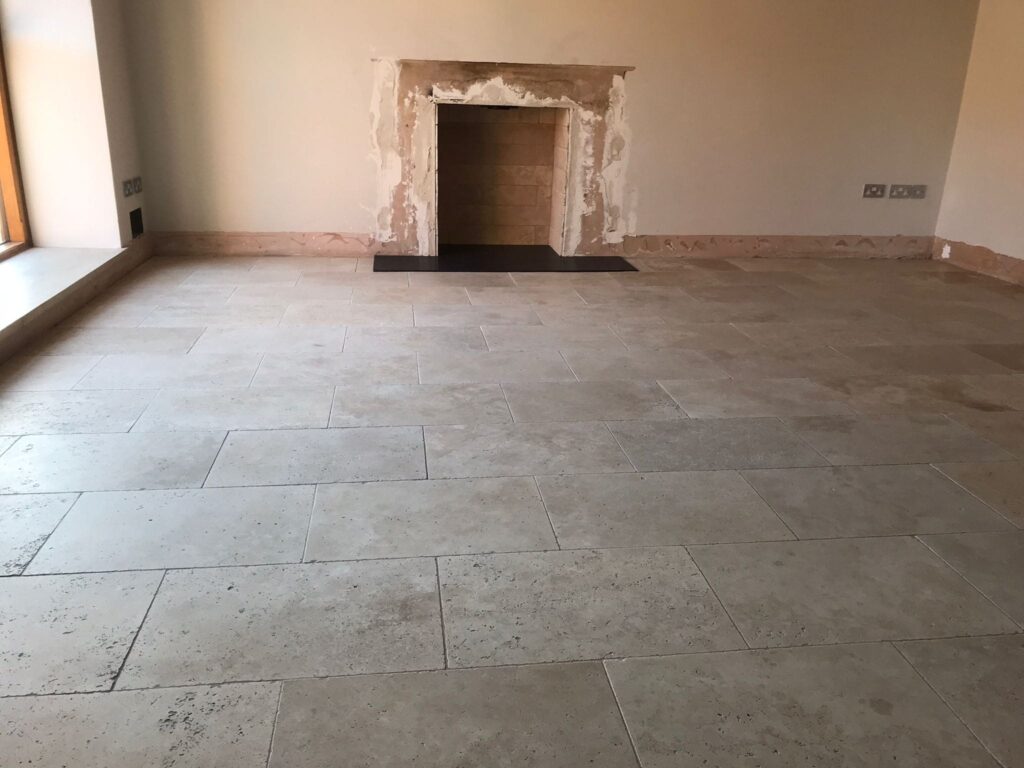
Travertine Floor Before Cleaning Boston

I visited the property to survey the new floor and came up with a plan to strip off the current sealer, polish the stone and then re-seal with the same product that I used previously. They were happy for me to go ahead and we set a date for the work to start which would take two days.

Travertine Floor Before Cleaning Boston

Cleaning and Burnishing a Travertine Tiled Floor

I returned on the agreed date and spent the first day burnishing the new Travertine floor tiles with a set of burnishing pads of different grits. Work starts with a coarse 400-grit pad, attached to a rotary floor buffer. Using water to lubricate the process the pad is run over each tile several times removing the sealer and any remaining dirt in the process.

Afterwards the floor was rinsed using our Rotovac system which applies water under high pressure to the floor dislodging the soils and then extracts the dirty water off the floor at high speed. The burnishing process was then repeated with the finer 800-grit and 1500-grit pads which start building the polish on the stone.

After a final rinse the process was repeated using a very fine 3000-grit pad which is applied dry to the floor using only a little water sprayed onto the tile. This last pad is the final step in the polishing process and leaves a lovely, honed finish on the stone.

During the polishing however it became apparent that the Travertine tiles contained a lot more holes that the other floor. These holes or pits as they are often called are a natural feature of this stone however, they do trap dirt easily so I agreed to fill them. I use a flexible filler for this which is colour matched to the stone and then to go off, I also left a floor dryer system in place overnight to assist with this and further drying out the tiles.

Travertine Floor During Cleaning Boston

Sealing a Travertine Tiled Floor

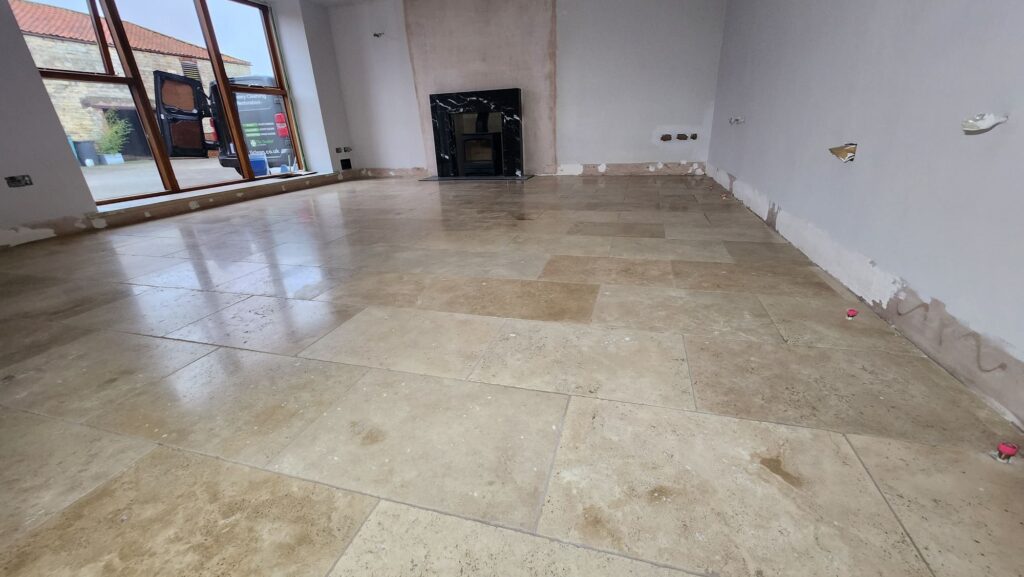
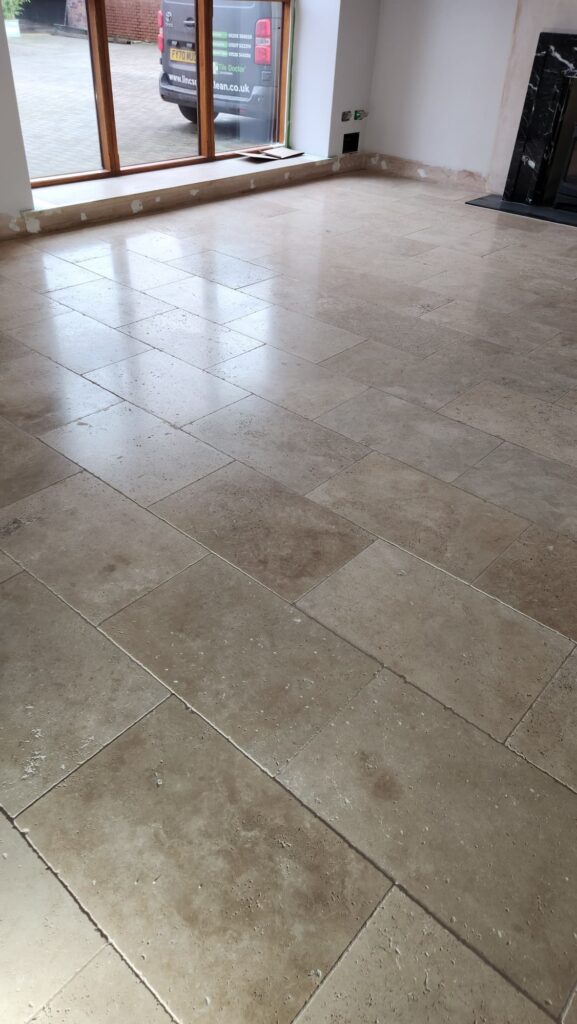
Returning the following morning the floor was tested the flooring with a damp meter to make sure it was fully dry. All was well and it was ready to seal with our quality impregnating sealer Tile Doctor Colour Grow which protects the floor from within whilst enhancing the natural colours and tones in the stone. Three coats of sealer were used to ensure the tiles were fully sealed and the result proved to be a good match to their other Travertine floor.

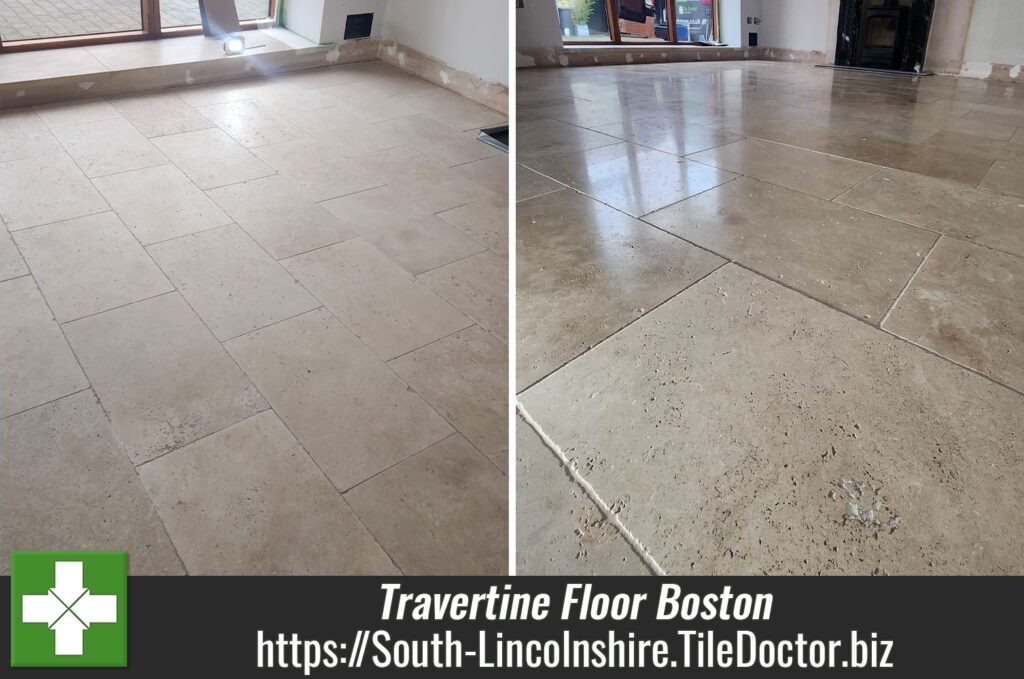
Travertine Floor After Renovation Boston

The customer was over the moon with the results and I took time afterwards to remind them about the best way to maintain the floor. For polished stone floors like this one I recommended Tile Doctor Stone Soap which will help maintain the patina on both Travertine floors.

Travertine Floor After Renovation Boston


Professional Tile Cleaning, Burnishing and Sealing for a Travertine Tiled Kitchen Floor in Sleaford

Replacing the Sealer and Polishing a New Travertine Tiled Floor in Boston Read More »

Scroll to Top